Over the weekend, while at Green Earth Survival School’s Primitive Skills class, we covered making a very effective adhesive from pine sap.
The process, like most primitive skills, is wondrously simple. Collect sap from pine trees. Heat it. Add bulking agents. Use it. It is waterproof and strong.
Let’s break down the process to clarify how its done.
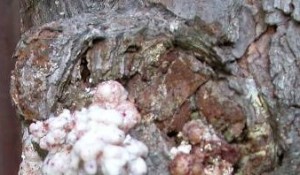
 Pine sap collects in “blisters” at places where a tree receives a wound. This can be from a branch breaking off, another tree falling into it, or, with some forethought, an axe chopping out a wedge. The sap flows slowly, so it takes several days, if not weeks or months, for it to accumulate, depending on the temperature. While collecting it, take care to try to NOT pick up much bark, this makes for a cleaner finished product without the need to try to strain it. Collect about twice as much as you expect to need, if not more. Once processed, it stores fairly well, and for quite a long time.
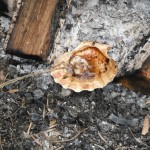
Once you have your pine sap, you will need a container to heat it in. We opted for a shell, as we are in Florida, and they are as common as dandelions are up north. Place the shell near the edge of the coals (you do have a fire, right?), but not so close that it will ignite. Pine sap is VERY flammable, and the reason “fat lighter” or “fatwood” is so popular for starting fires. (Amazon.com shows 201 different fatwood products!)
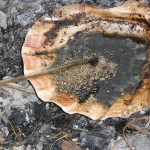
 As the seashell starts to heat up, add in the chunks of collected pine sap, trying to remove any bits of bark, dirt, or other debris. Stir it as it melts, making sure to move it back away from the heat if it starts to boil. (Boiling makes the end product become too brittle.)
Once it is fully melted, add in a little bit of finely ground charcoal and some finely ground dry vegetable matter. The vegetable matter we used was dry rabbit pellets (poop!), since they are 100% vegetation, and pre-ground by the rabbit.  Our dry ingredients looked to be about 60% charcoal and 40% dried & pulverized rabbit pellets. We added enough to start thickening it.
As it started to thicken, we watched for the pitch to start sticking to the stirring stick. Once it starts to thicken, take a thin stick and twirl it in the molten pitch to get a decent amount of pitch to cover the tip, much like a Q-Tip.
Let the first layer cool, then test it for hardness. When cooled, it should yield slightly to a fingernail, but still remain firm. If it is too soft, add more dry filler, or cook a little longer. Too hard, and you need to add more unmelted sap. After doing this a few times, you’ll get the hang of it.
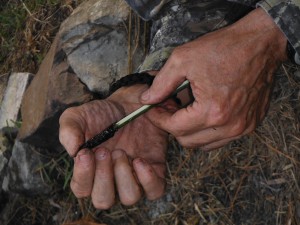
 Removing it from the molten pitch, it quickly cools into a hard lump on the stick. After cooling, we re-dip, much like making a candle. As the lump grows with each successive layer, shape it into a long drumstick-like shape. These “drumsticks” became both the storage and applicators for our future usage of the glue.
To use, simple heat it up, and apply. The pitch sticks to about everything, and once hardened, stays slightly pliable, yet hard. It was used to glue feathers to darts and arrows, seal containers, waterproof clothes, seal bark canoes, and just about a zillion other things. Maybe two zillion. It was about the only glue for a very long part of our history, and still works as well today as it did then.
Peace,
db
It was a pleasure meeting you this weekend!! You truly are a wealthy man in the currency of knowledge. You aren’t kidding about the Pine Pitch Glue! I took me a full day of picking and rubbing to get the stuff off of my skin. I don’t think I will ever get it out of my clothes!
Thanks again for the kind words!
db
Hi db, thanks for all the great info! I would like to know if you have any tips on cleaning the pitch before processing. I need it extra clean because I’m making salve for wound care out of it. The pitch I have is mostly dry, sticky here and there chunks. There doesn’t appear to be branches or pieces of matter in it, but it does feel like it has a lot of dirt and dust on it. How can I clean this off as much as possible before melting it? Thanks in advance..
M
Heat it to melting then skim off the crud at the top. And when pouring, be sure to not pour out the sediment along with the melted pitch.
YOu would strain it while it is melted. It would have to be a fairly open weave strainer though. Cheesecloth would do OK. A metal strainer would work well also. Don’t use one from the kitchen without the understanding that it shouldn’t ever be used again for food…unless you like the taste of turpentine!