Before I finally started using raised beds, I was looking at trying to raise veggies in the ground, or simple pots. The ground around here is terrible for growing anything other than sandspurs, so that was out. To get an idea of what the local soil mostly consists of, take an hourglass and turn it over. That stuff that is dropping into the bottom is what we call “dirt” around here. Seriously. The REALLY bad stuff we call “sugar sand” and it can eat a car tire (ask me how I know this one) or 5 gallons of water with equal efficiency.
And since I’m horrible at remembering to water plants in containers, that didn’t work well either.
I noticed that the local grade school has a small section of the property assigned to an agricultural project. Initially, it was simply beds in the local soil. Nice. I wondered how they would get around the problems I had experienced.
It was no surprise when the school opted to try growing vegetables in bags of potting soil. A better option, but unsightly. Some folks prefer form over function. (Much to my wife’s annoyance, I’m not one of them.) Since they found it unsightly, a “better” option was found, Earthboxes. A great concept, and better yet, they work wonderfully. The school ramped up the Earthboxes, and showed great production in no time.
I was sold….
Until I realized that in order to plant everything I wanted, I’d need about twenty of them. At roughly $45 each (shipped), plus the cost of REAL soil, I’d have to shell out about $1,000.
NOT in my budget!
What to do? I started scouring the web for options on making my own, and finally found enough information to do it, learn what worked, then do it again.
Here is what I did.
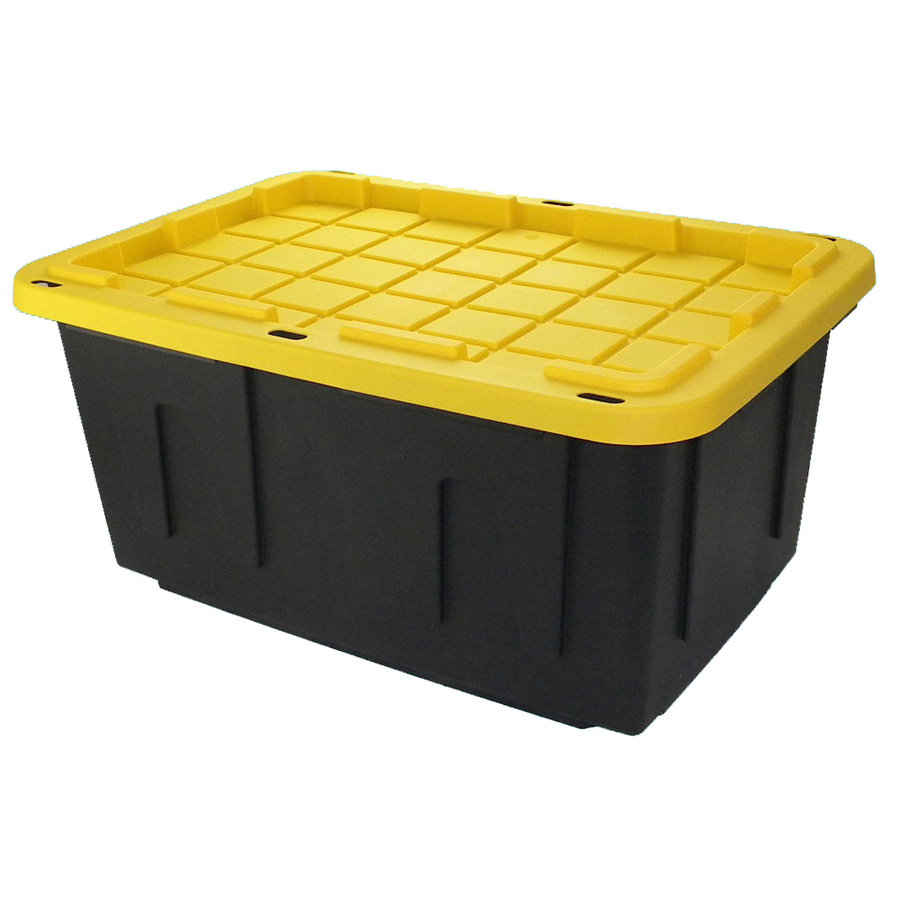
available at Lowes and Home Depot
Get a plastic “tote”. I’ve used various models, the thinner plastic ones tend to break down after several years though. Recently, I purchased a beefier model from Lowes, a “LLC 27-Gallon General Tote“, cost was $14-ish.

Cut the lid like this:
Be sure to cut around the outer edge, being sure to leave enough of the rim so that it will still latch to the top. This beefs up the outer edge, you’ll need the extra stiffness once it is loaded with water, soils, and plants.
Remove the cut out portion of the lid, and set it aside.
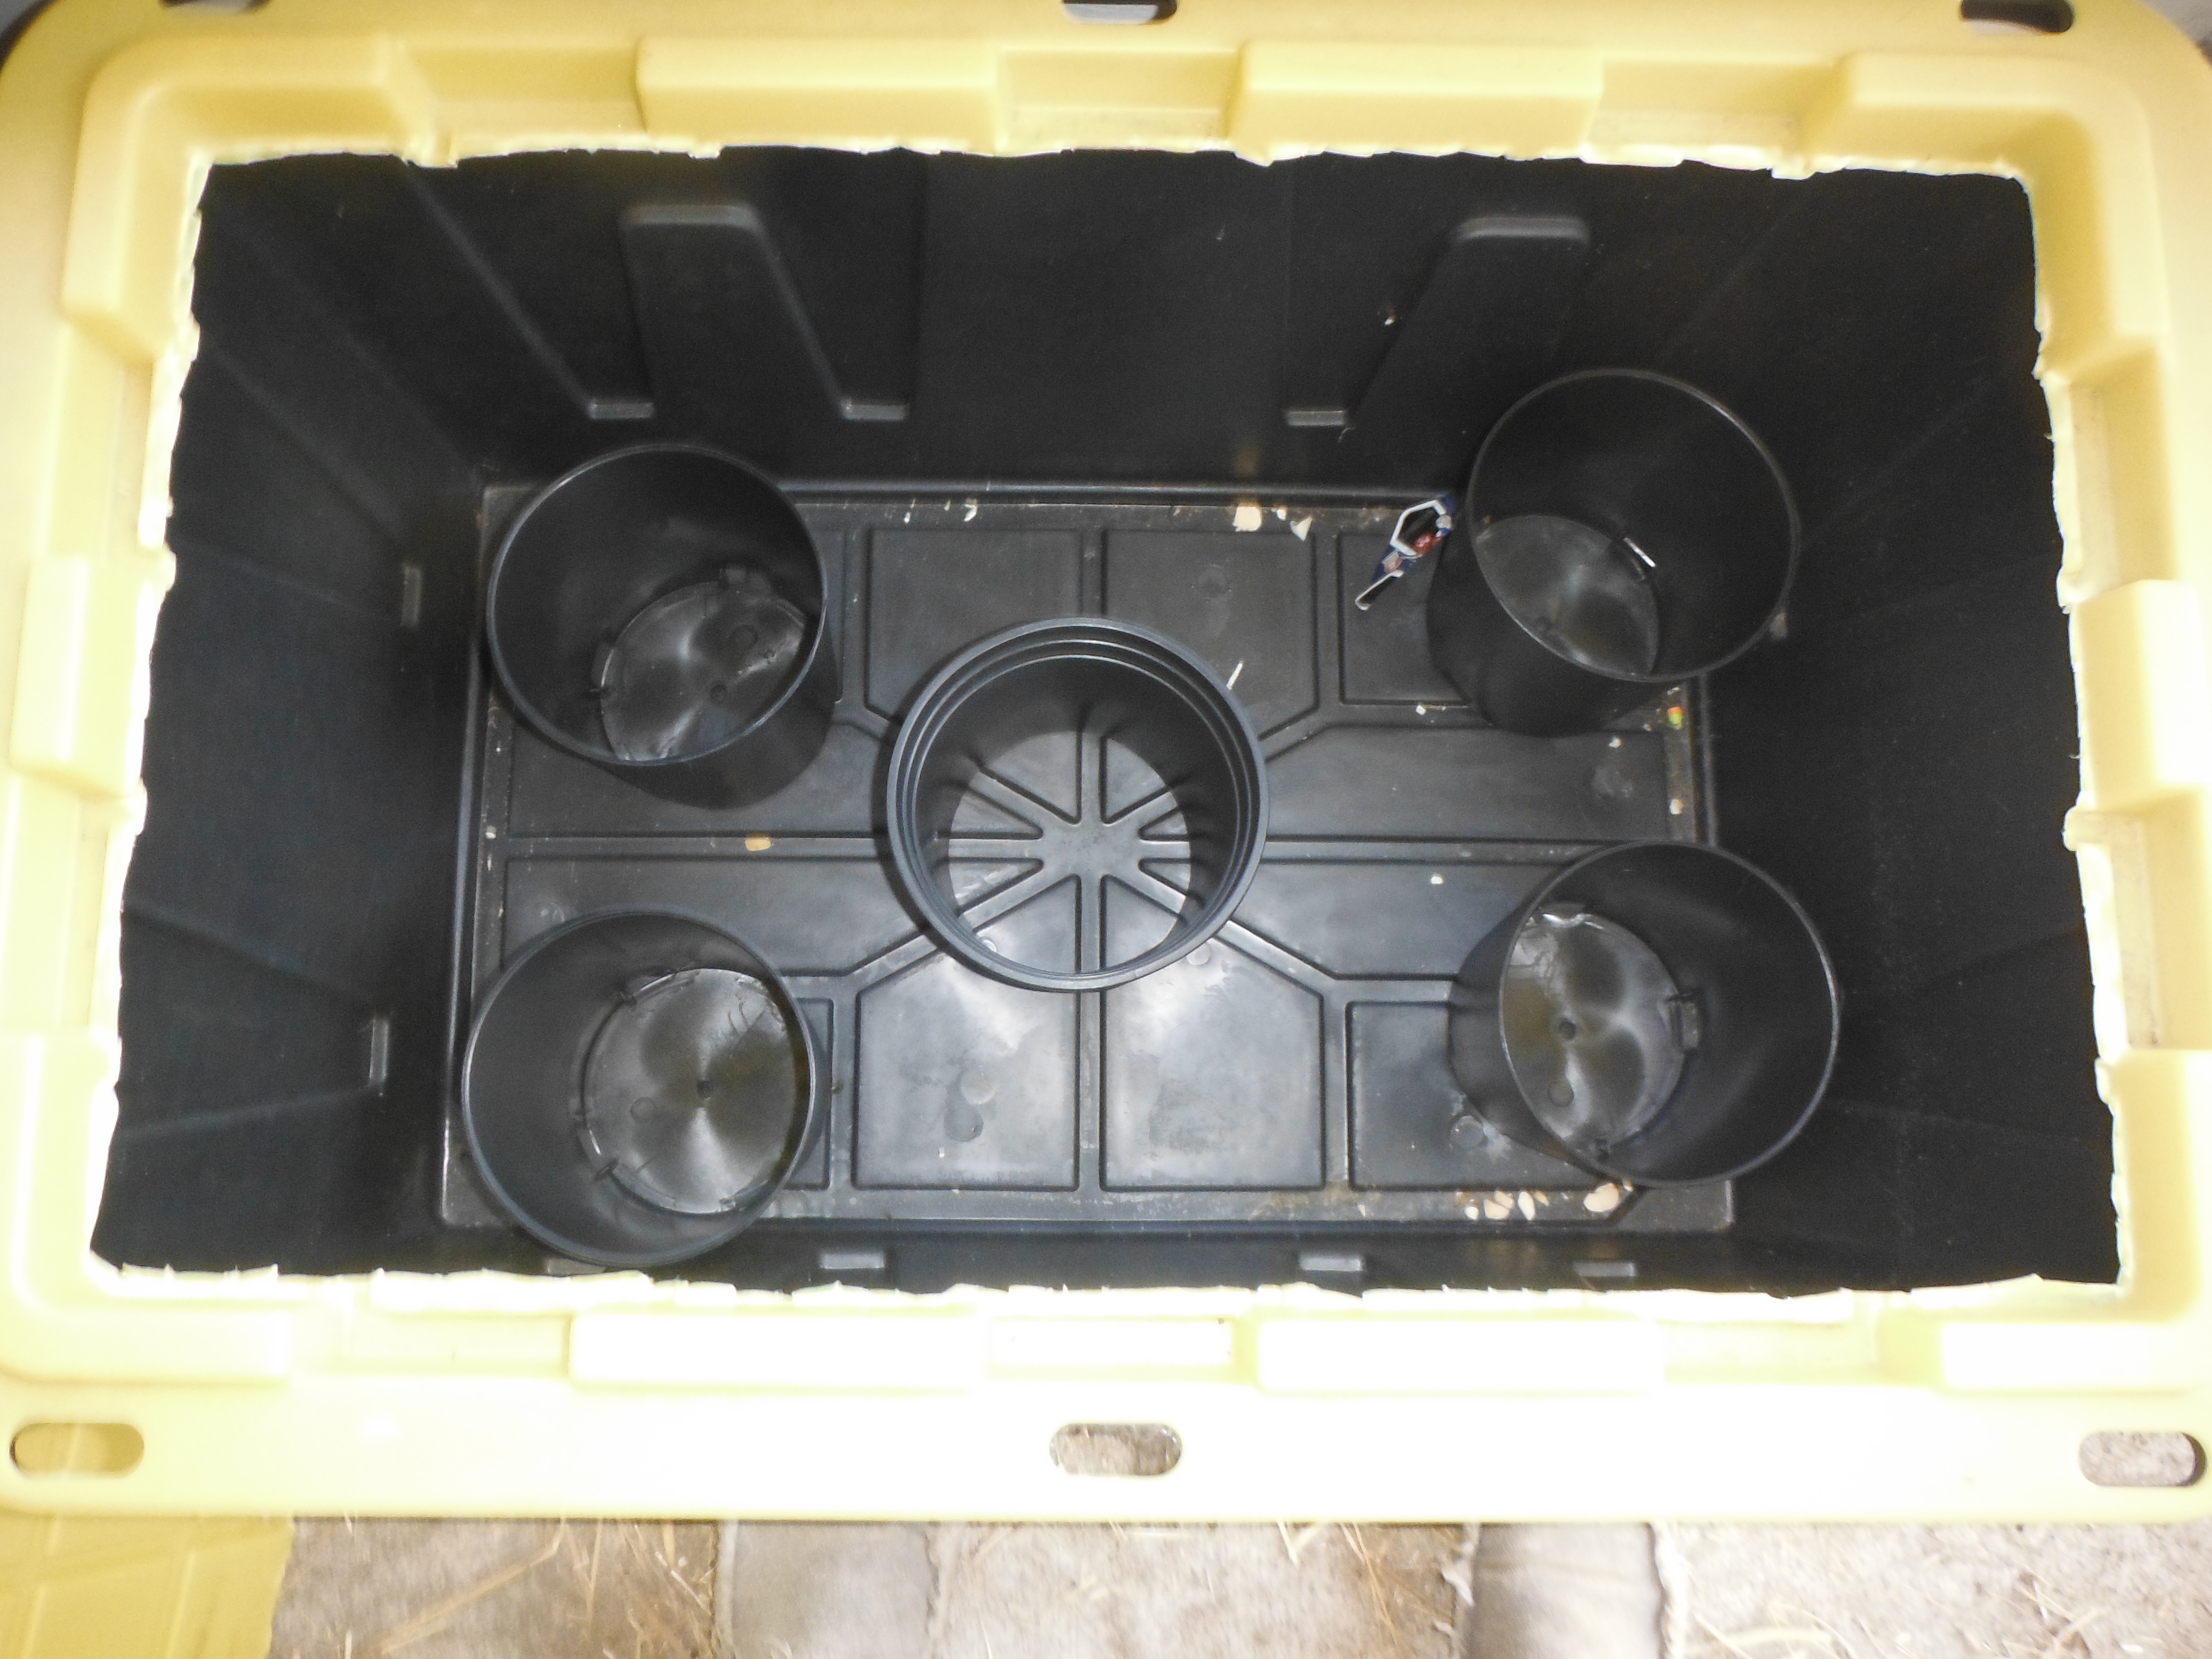 Get 5 old pots, the cheap plastic ones that plants come in are perfect. Make sure they are no taller than 4-6 inches. Cut them down if you need to. Alternatively, you can used 4-6 inch section of 4 inch drainage pipe. I’ve done it both ways, they work equally well. Set them in the bottom, spaced like this:
These set the depth of the soil, water will be beneath the height of the risers. At the height of the risers, poke a drainage hole in the side of the tote. This prevents the water from flooding the soil section.
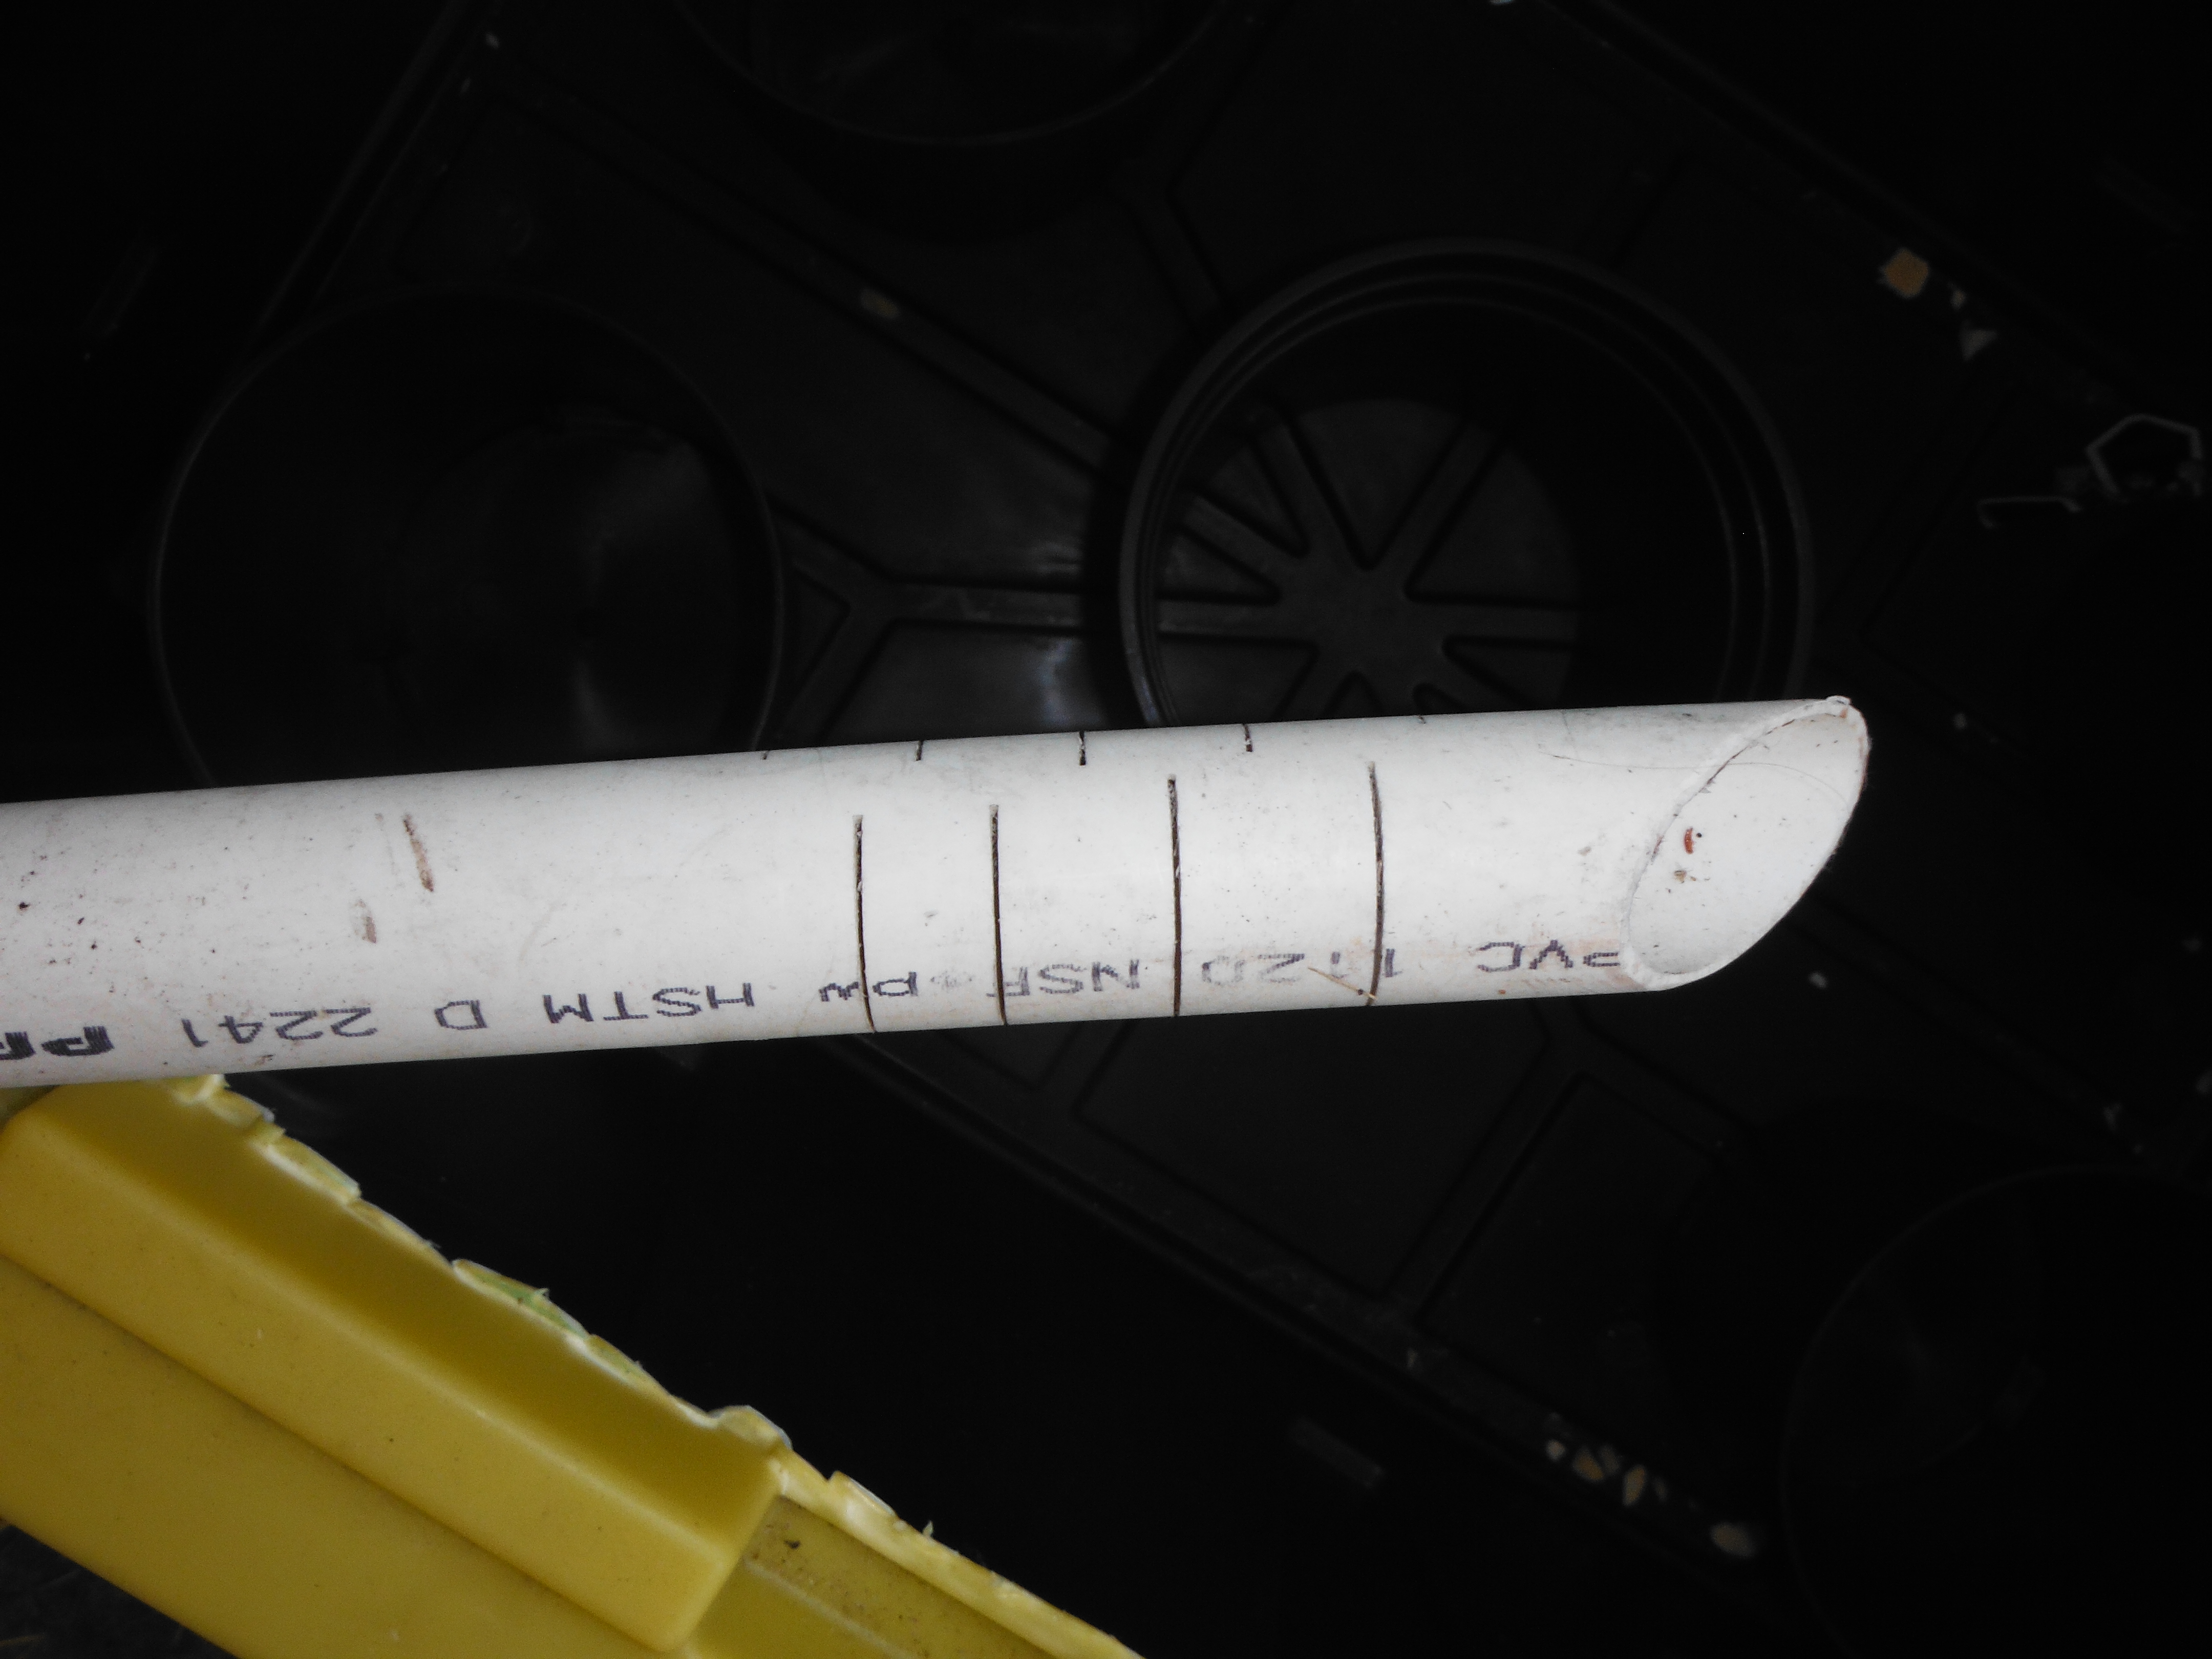
Take a 3/4 or 1 inch section of PVC pipe, about 6 inches taller than the height of the tote you are modifying. Cut the bottom end at an angle, and possibly some slits in it to allow the water to free flow out of the pipe. This becomes the watering point to deliver water to the bottom reservoir.
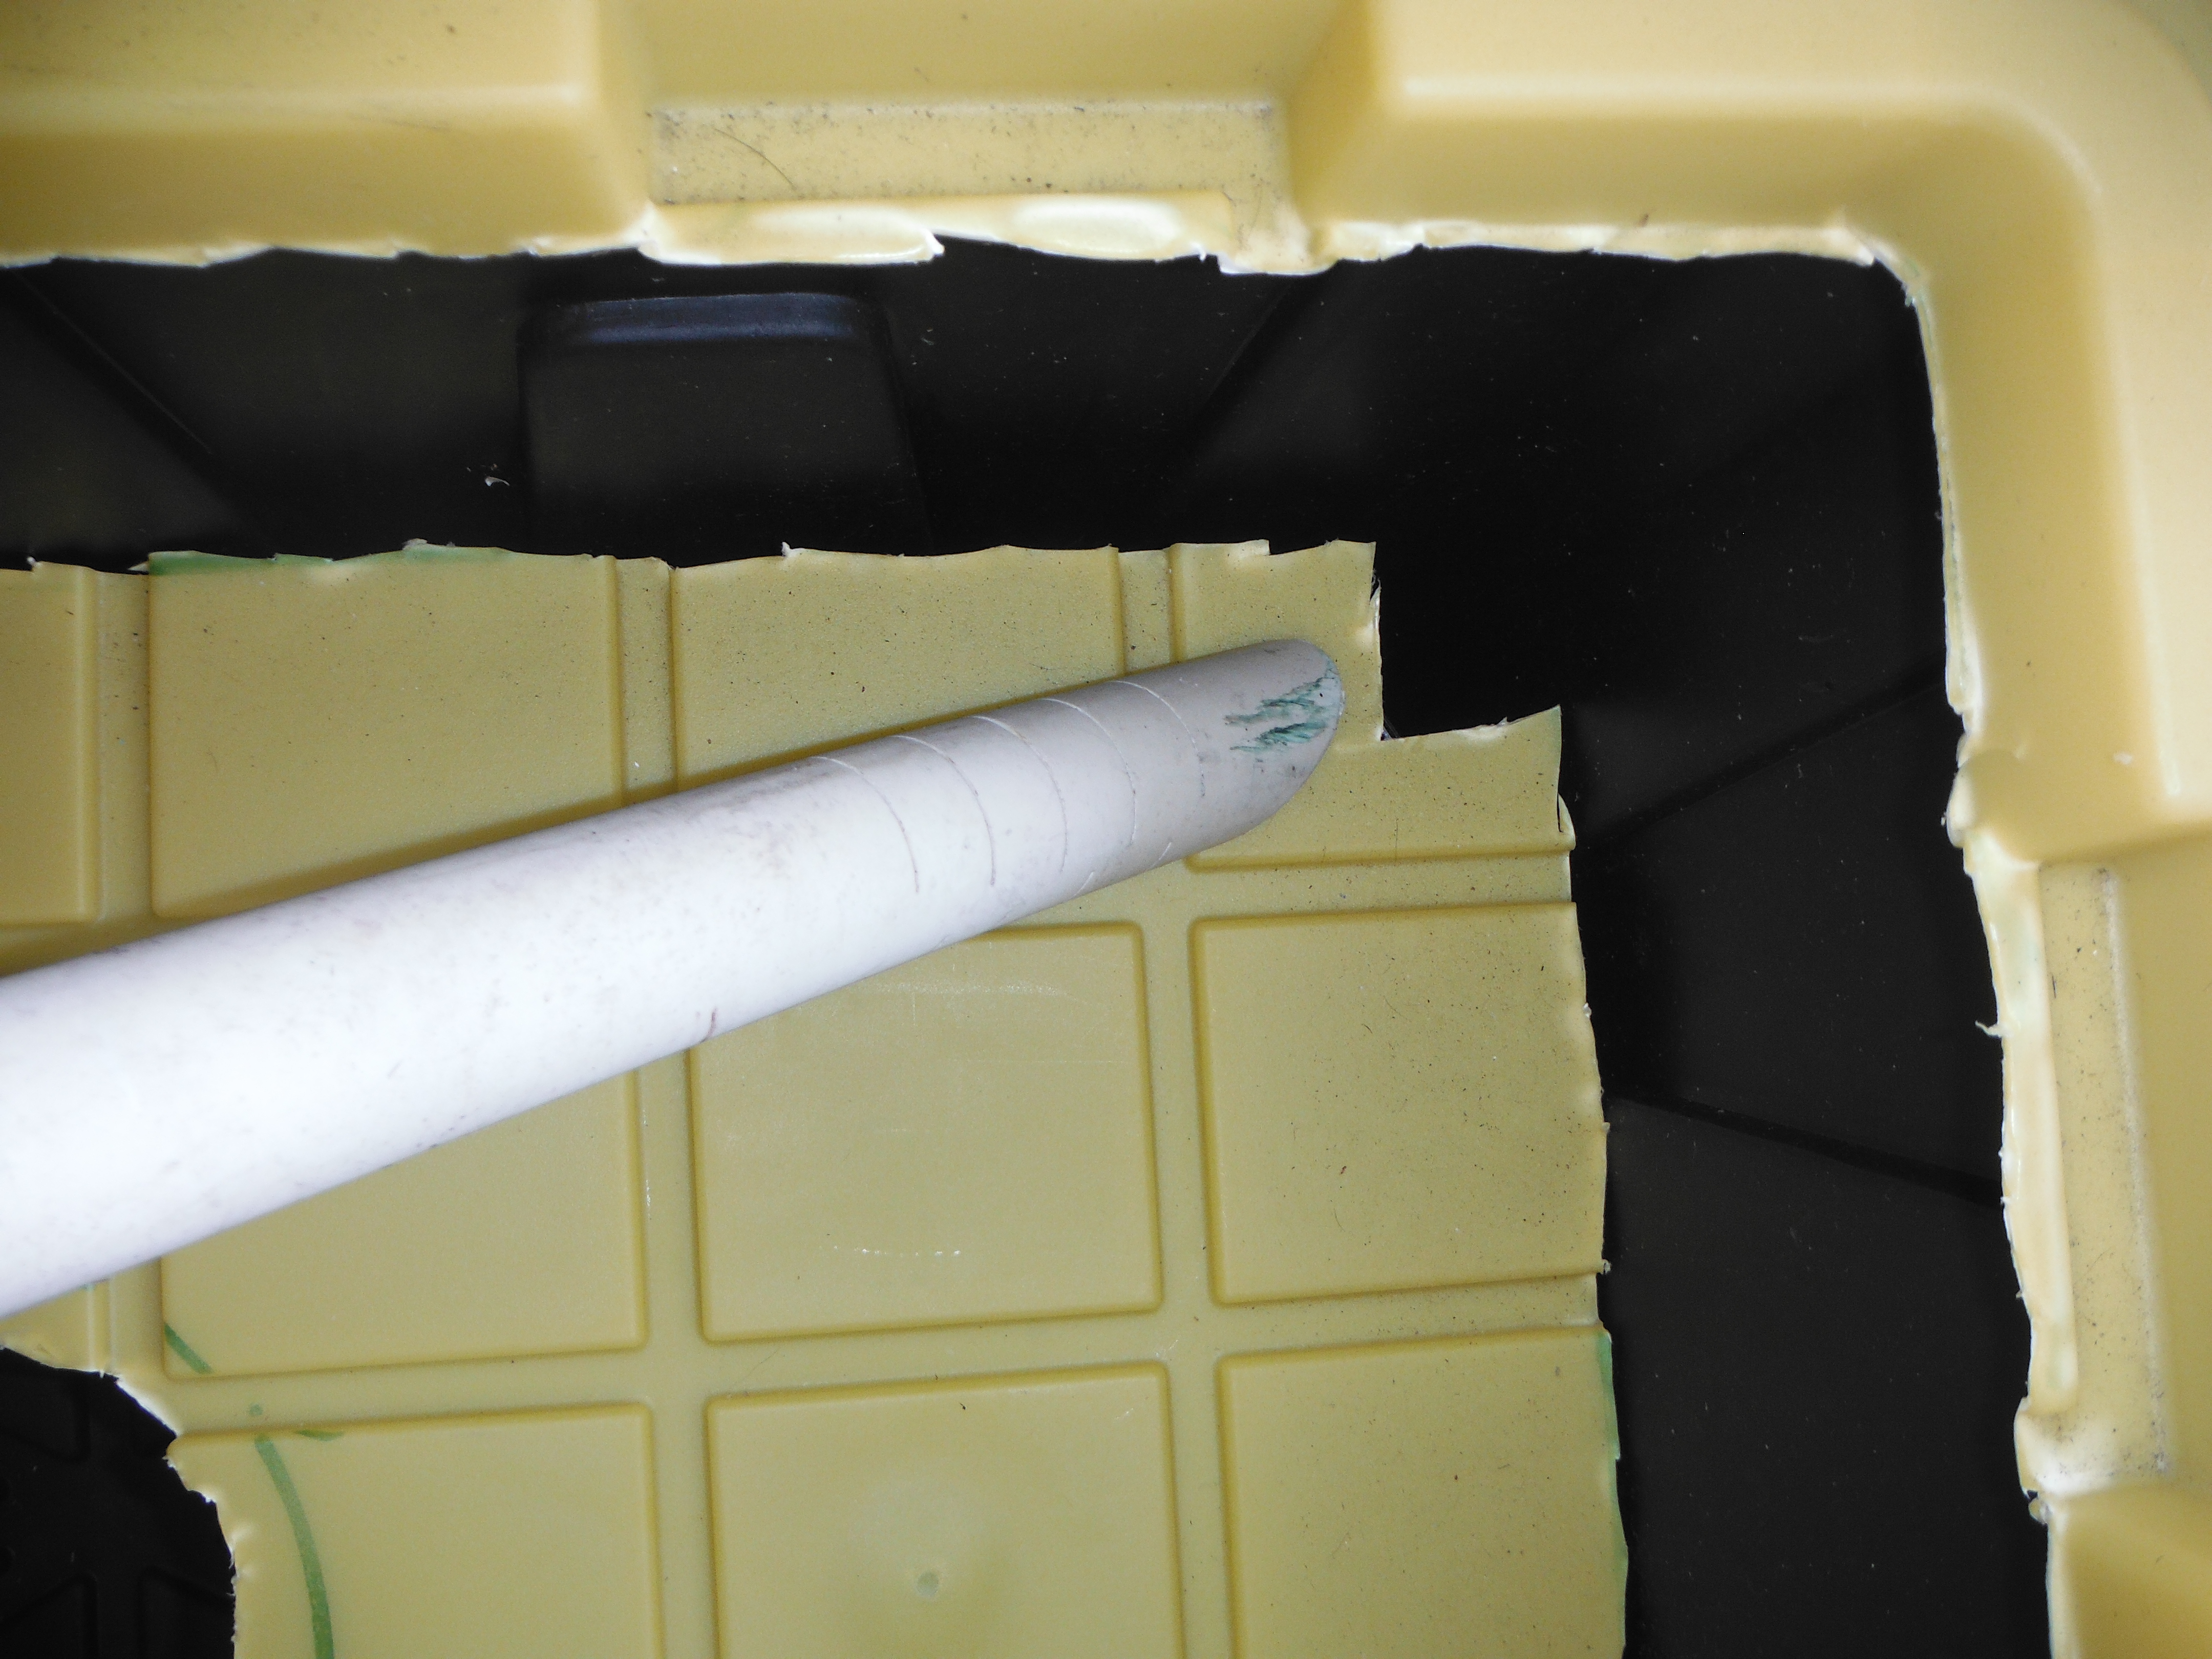
Now take the insert cut from the lid, and cut out a corner section like this:
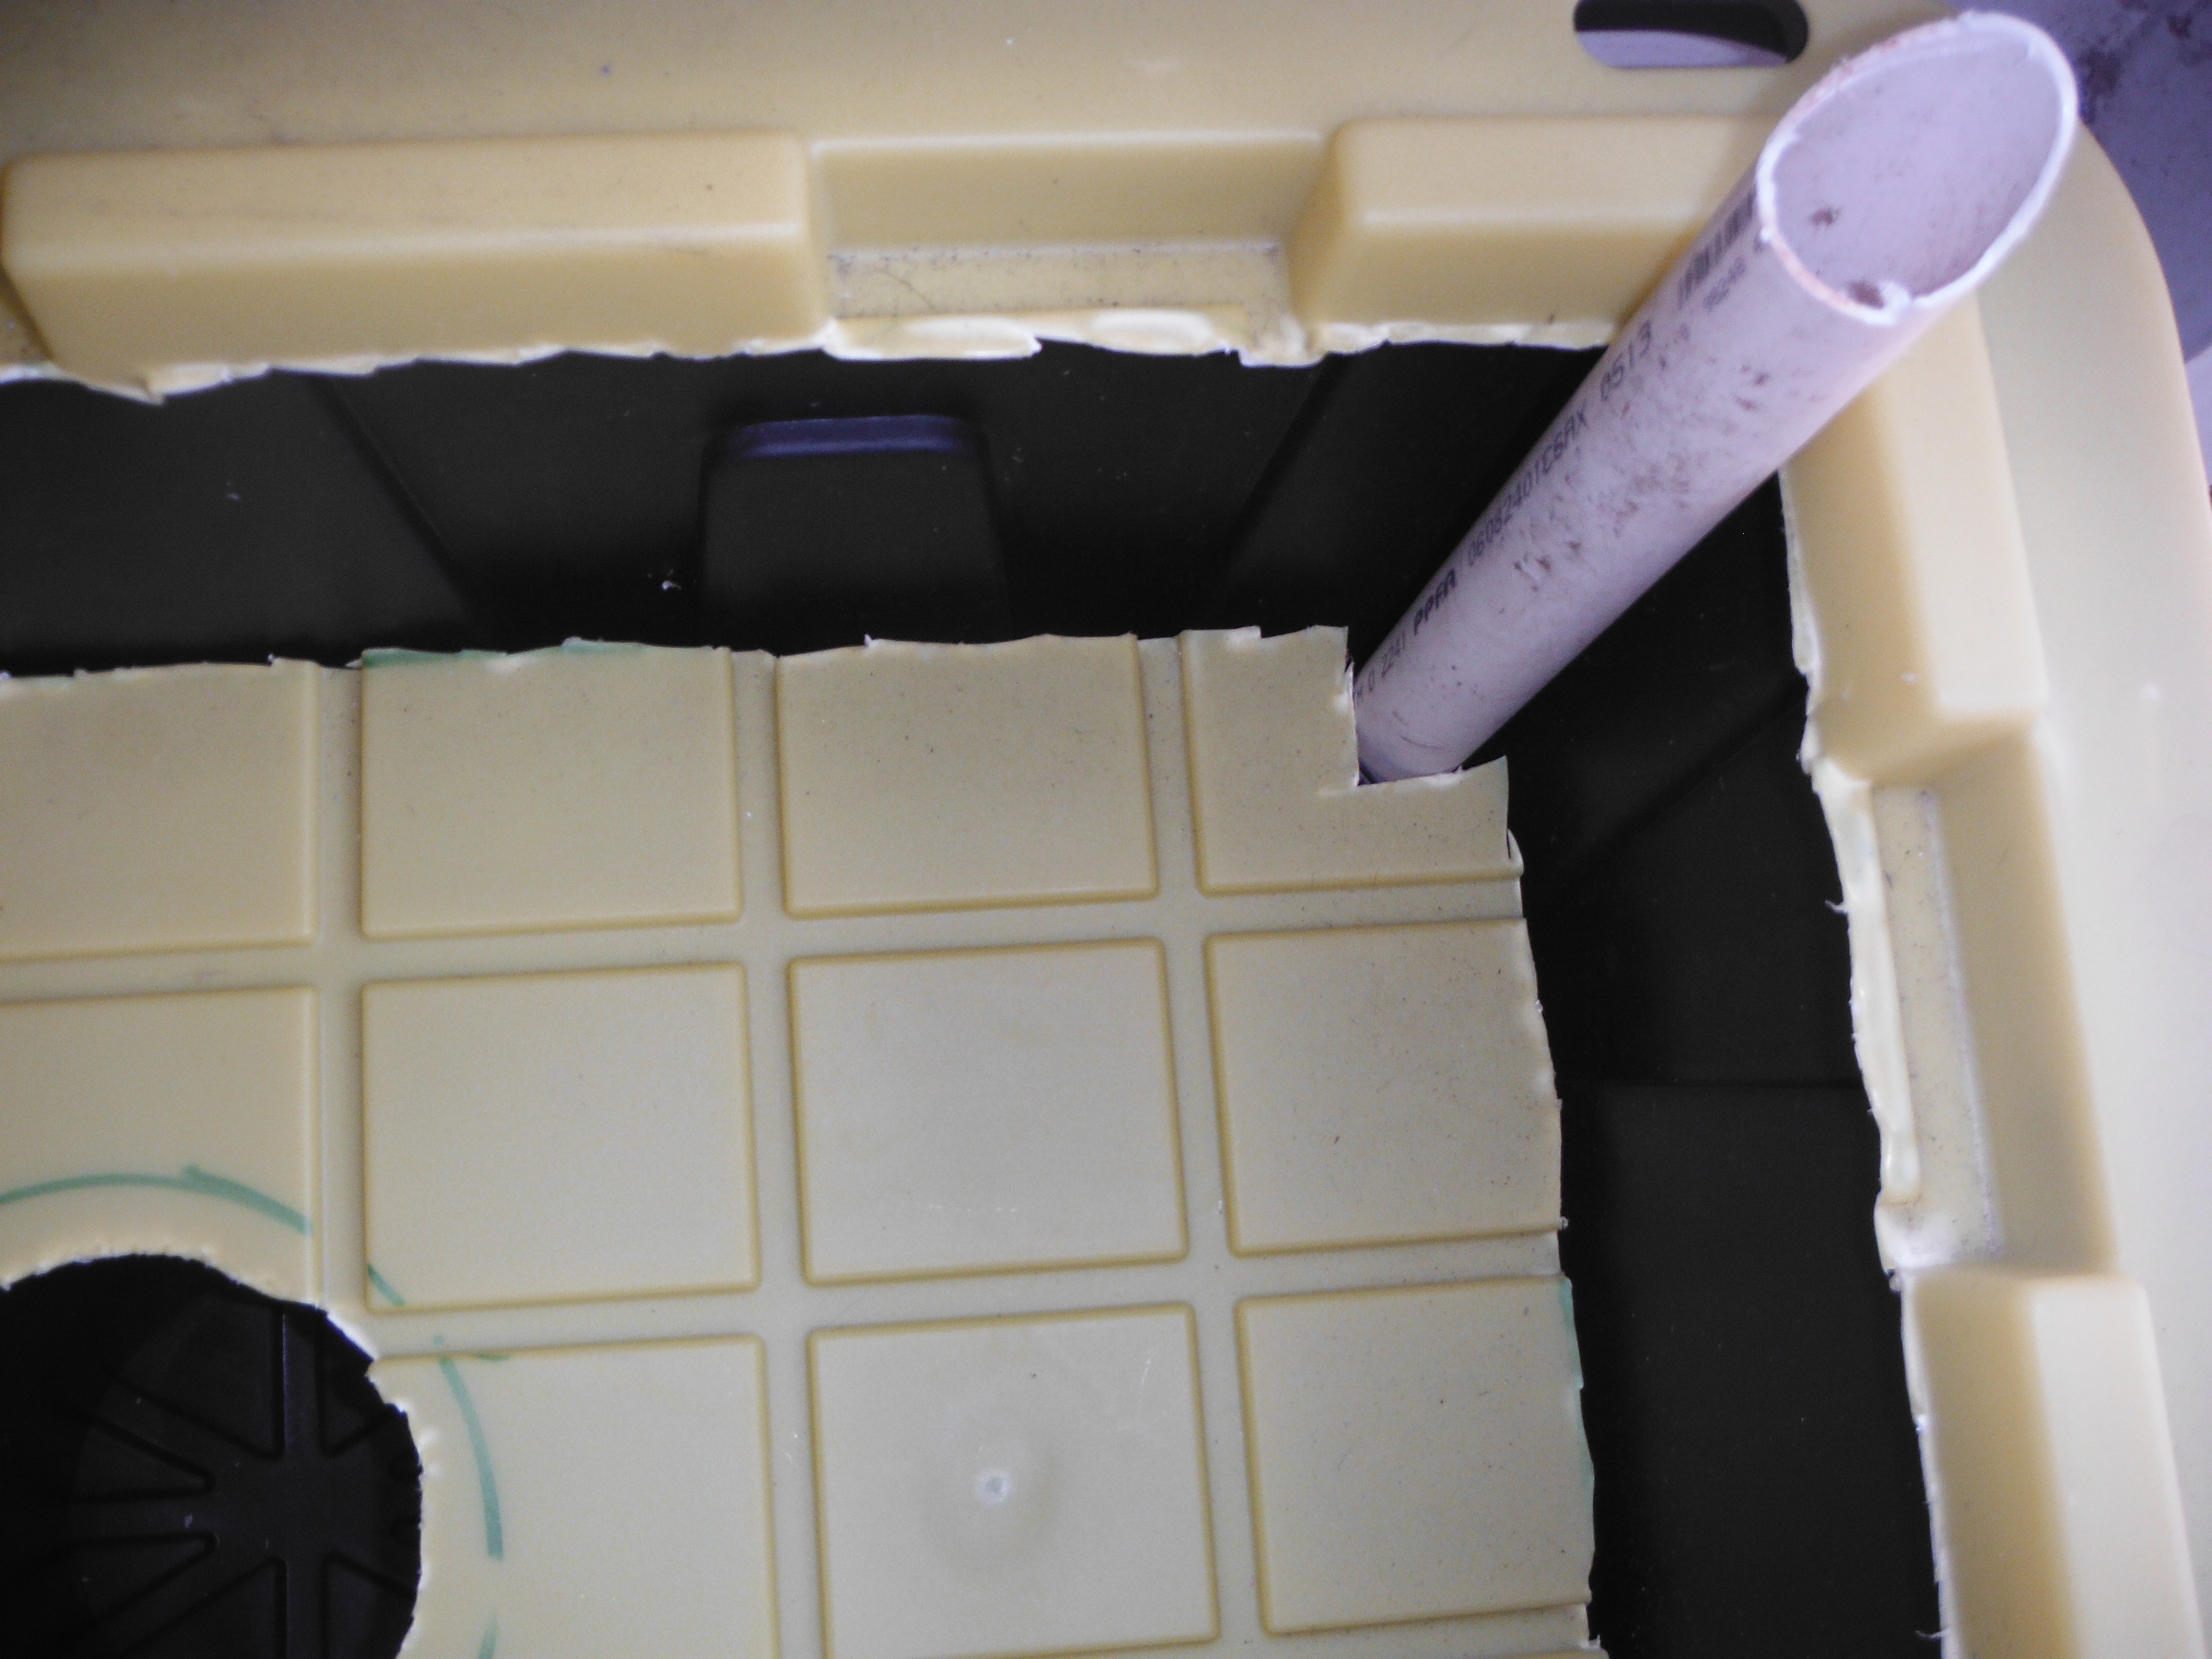
Set it upright in the corner. Soil tends to keep it in place just fine.

Add an additional pot into the center hole. This stiffens up the center section, and helps limit the amount of dirt that gets washed into the bottom.
Add soil. I opted to use this for soil, it was donated by a buddy that moved. Any good potting soil, or composted manure would work fine. I mixed it 50/50.
+
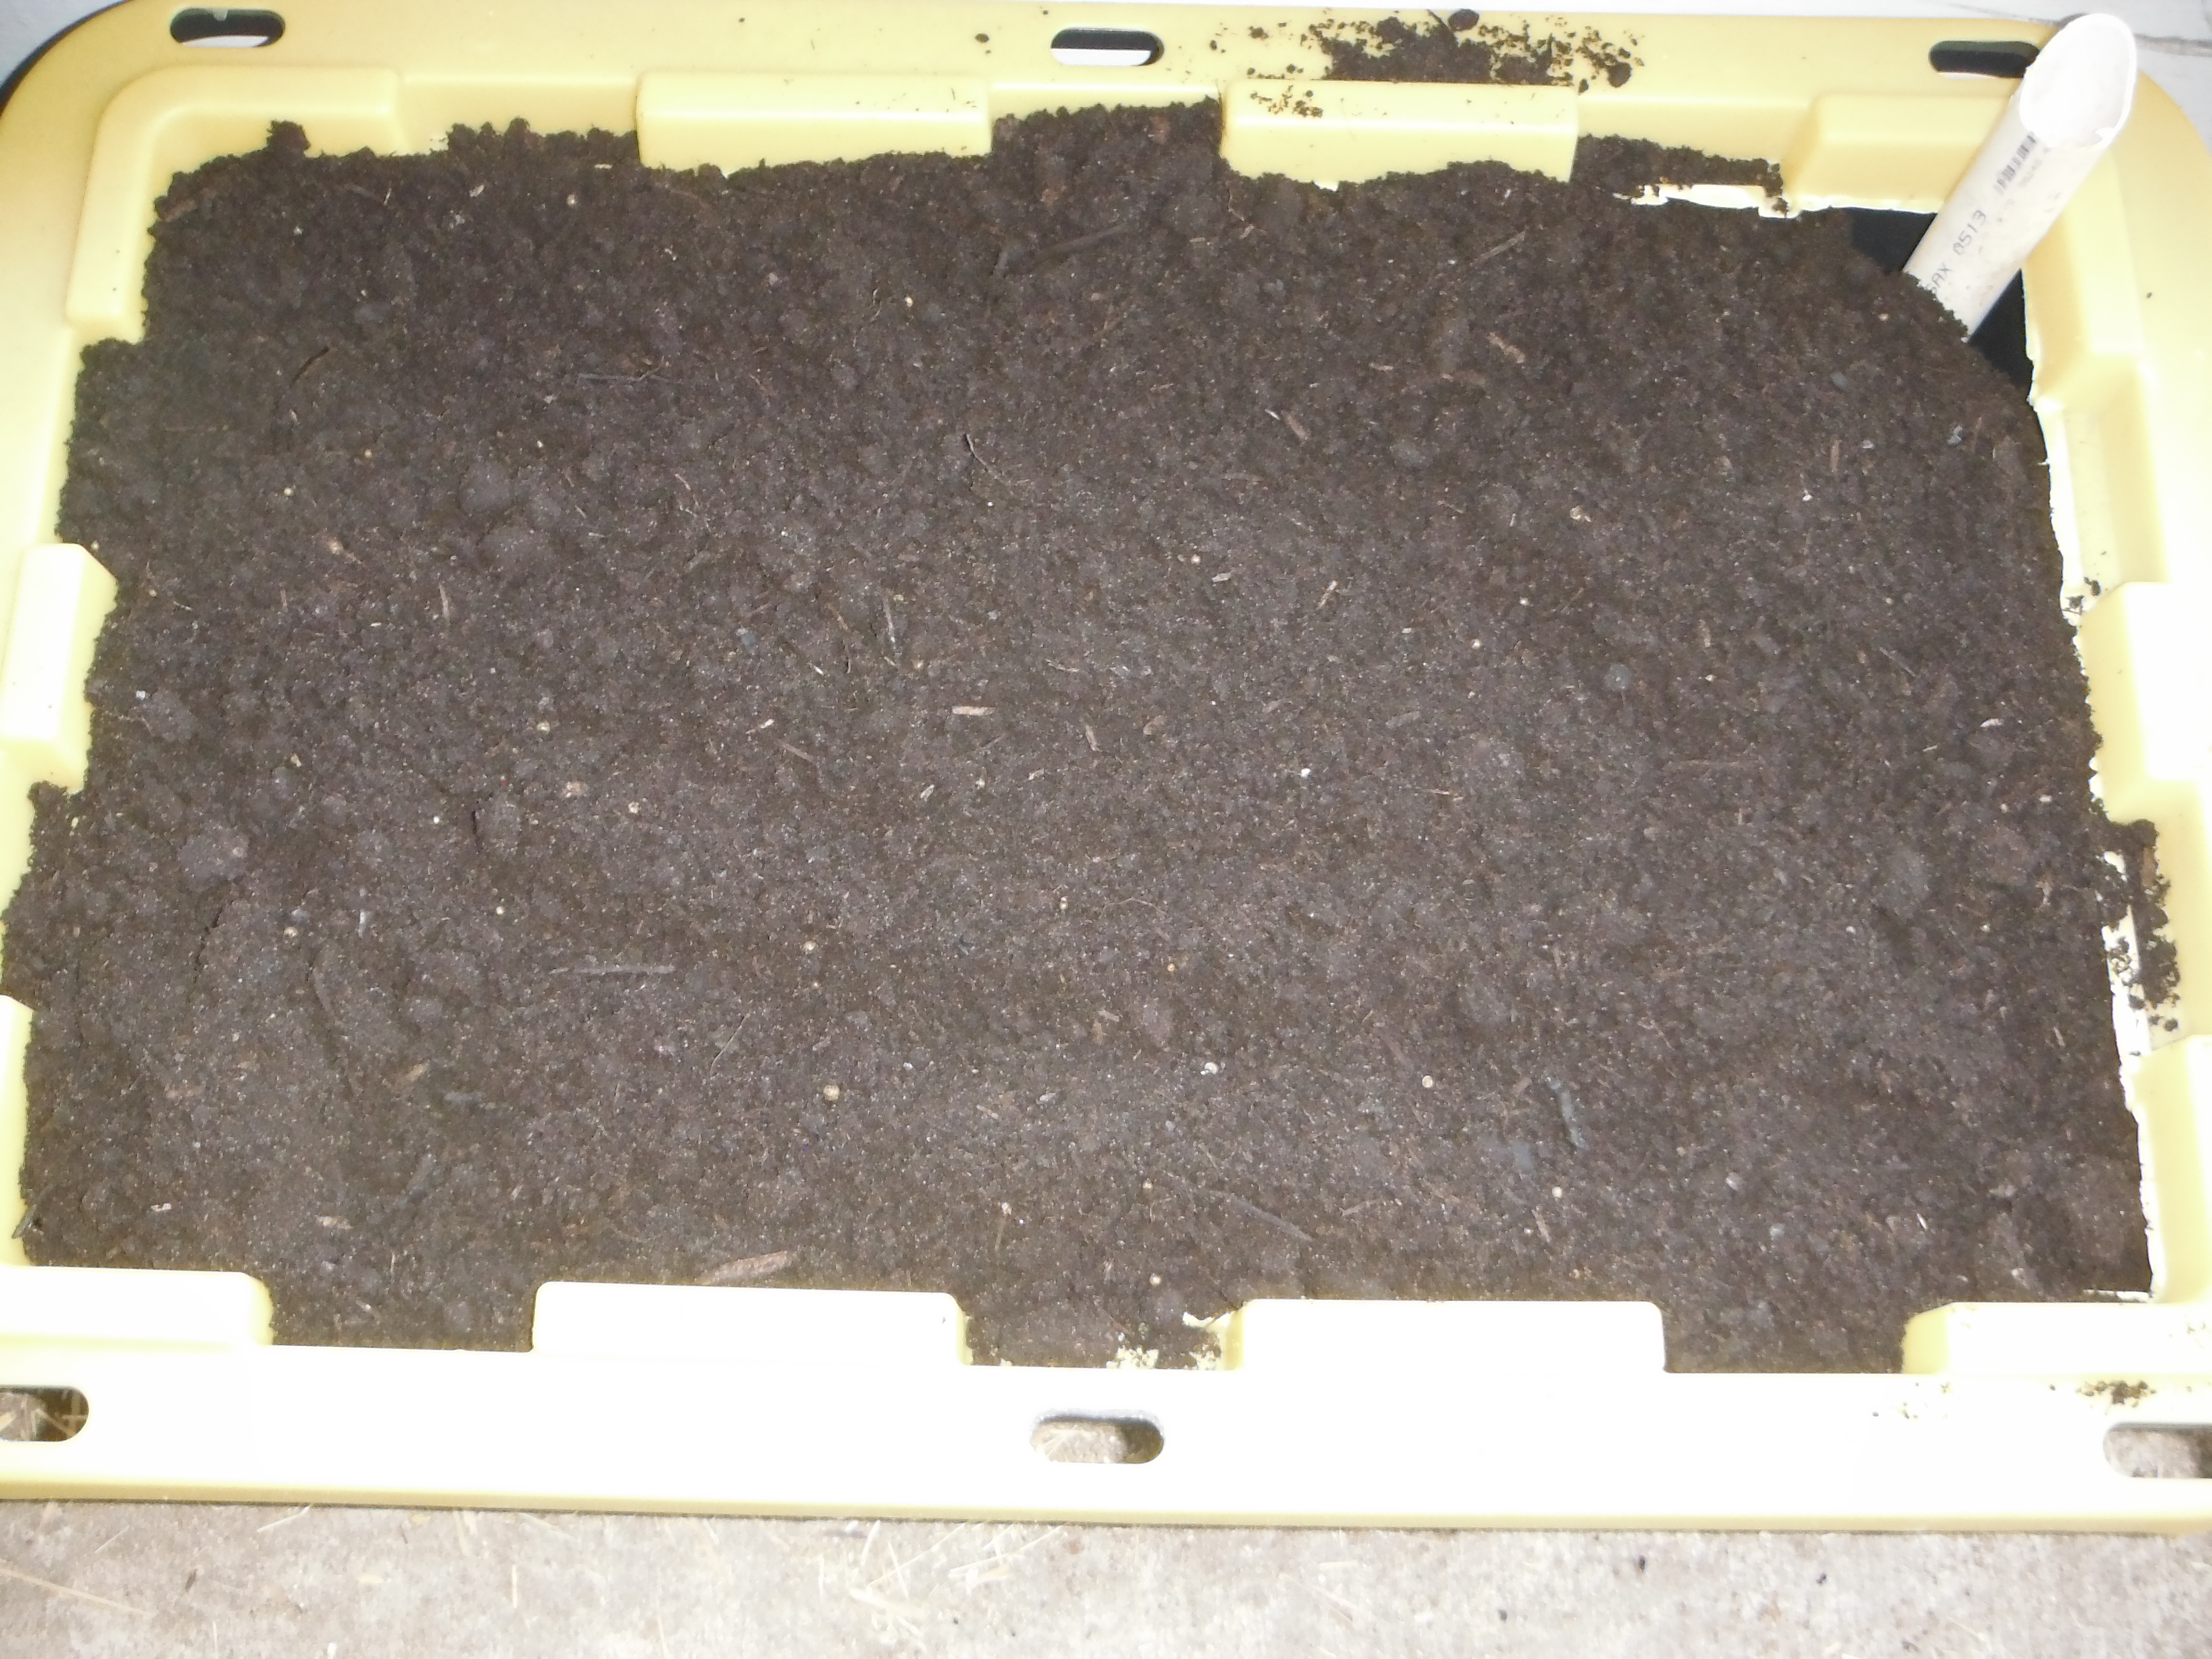
Fill it up! BE sure to shake it a bit to get the soil settled. Then water the soil well.
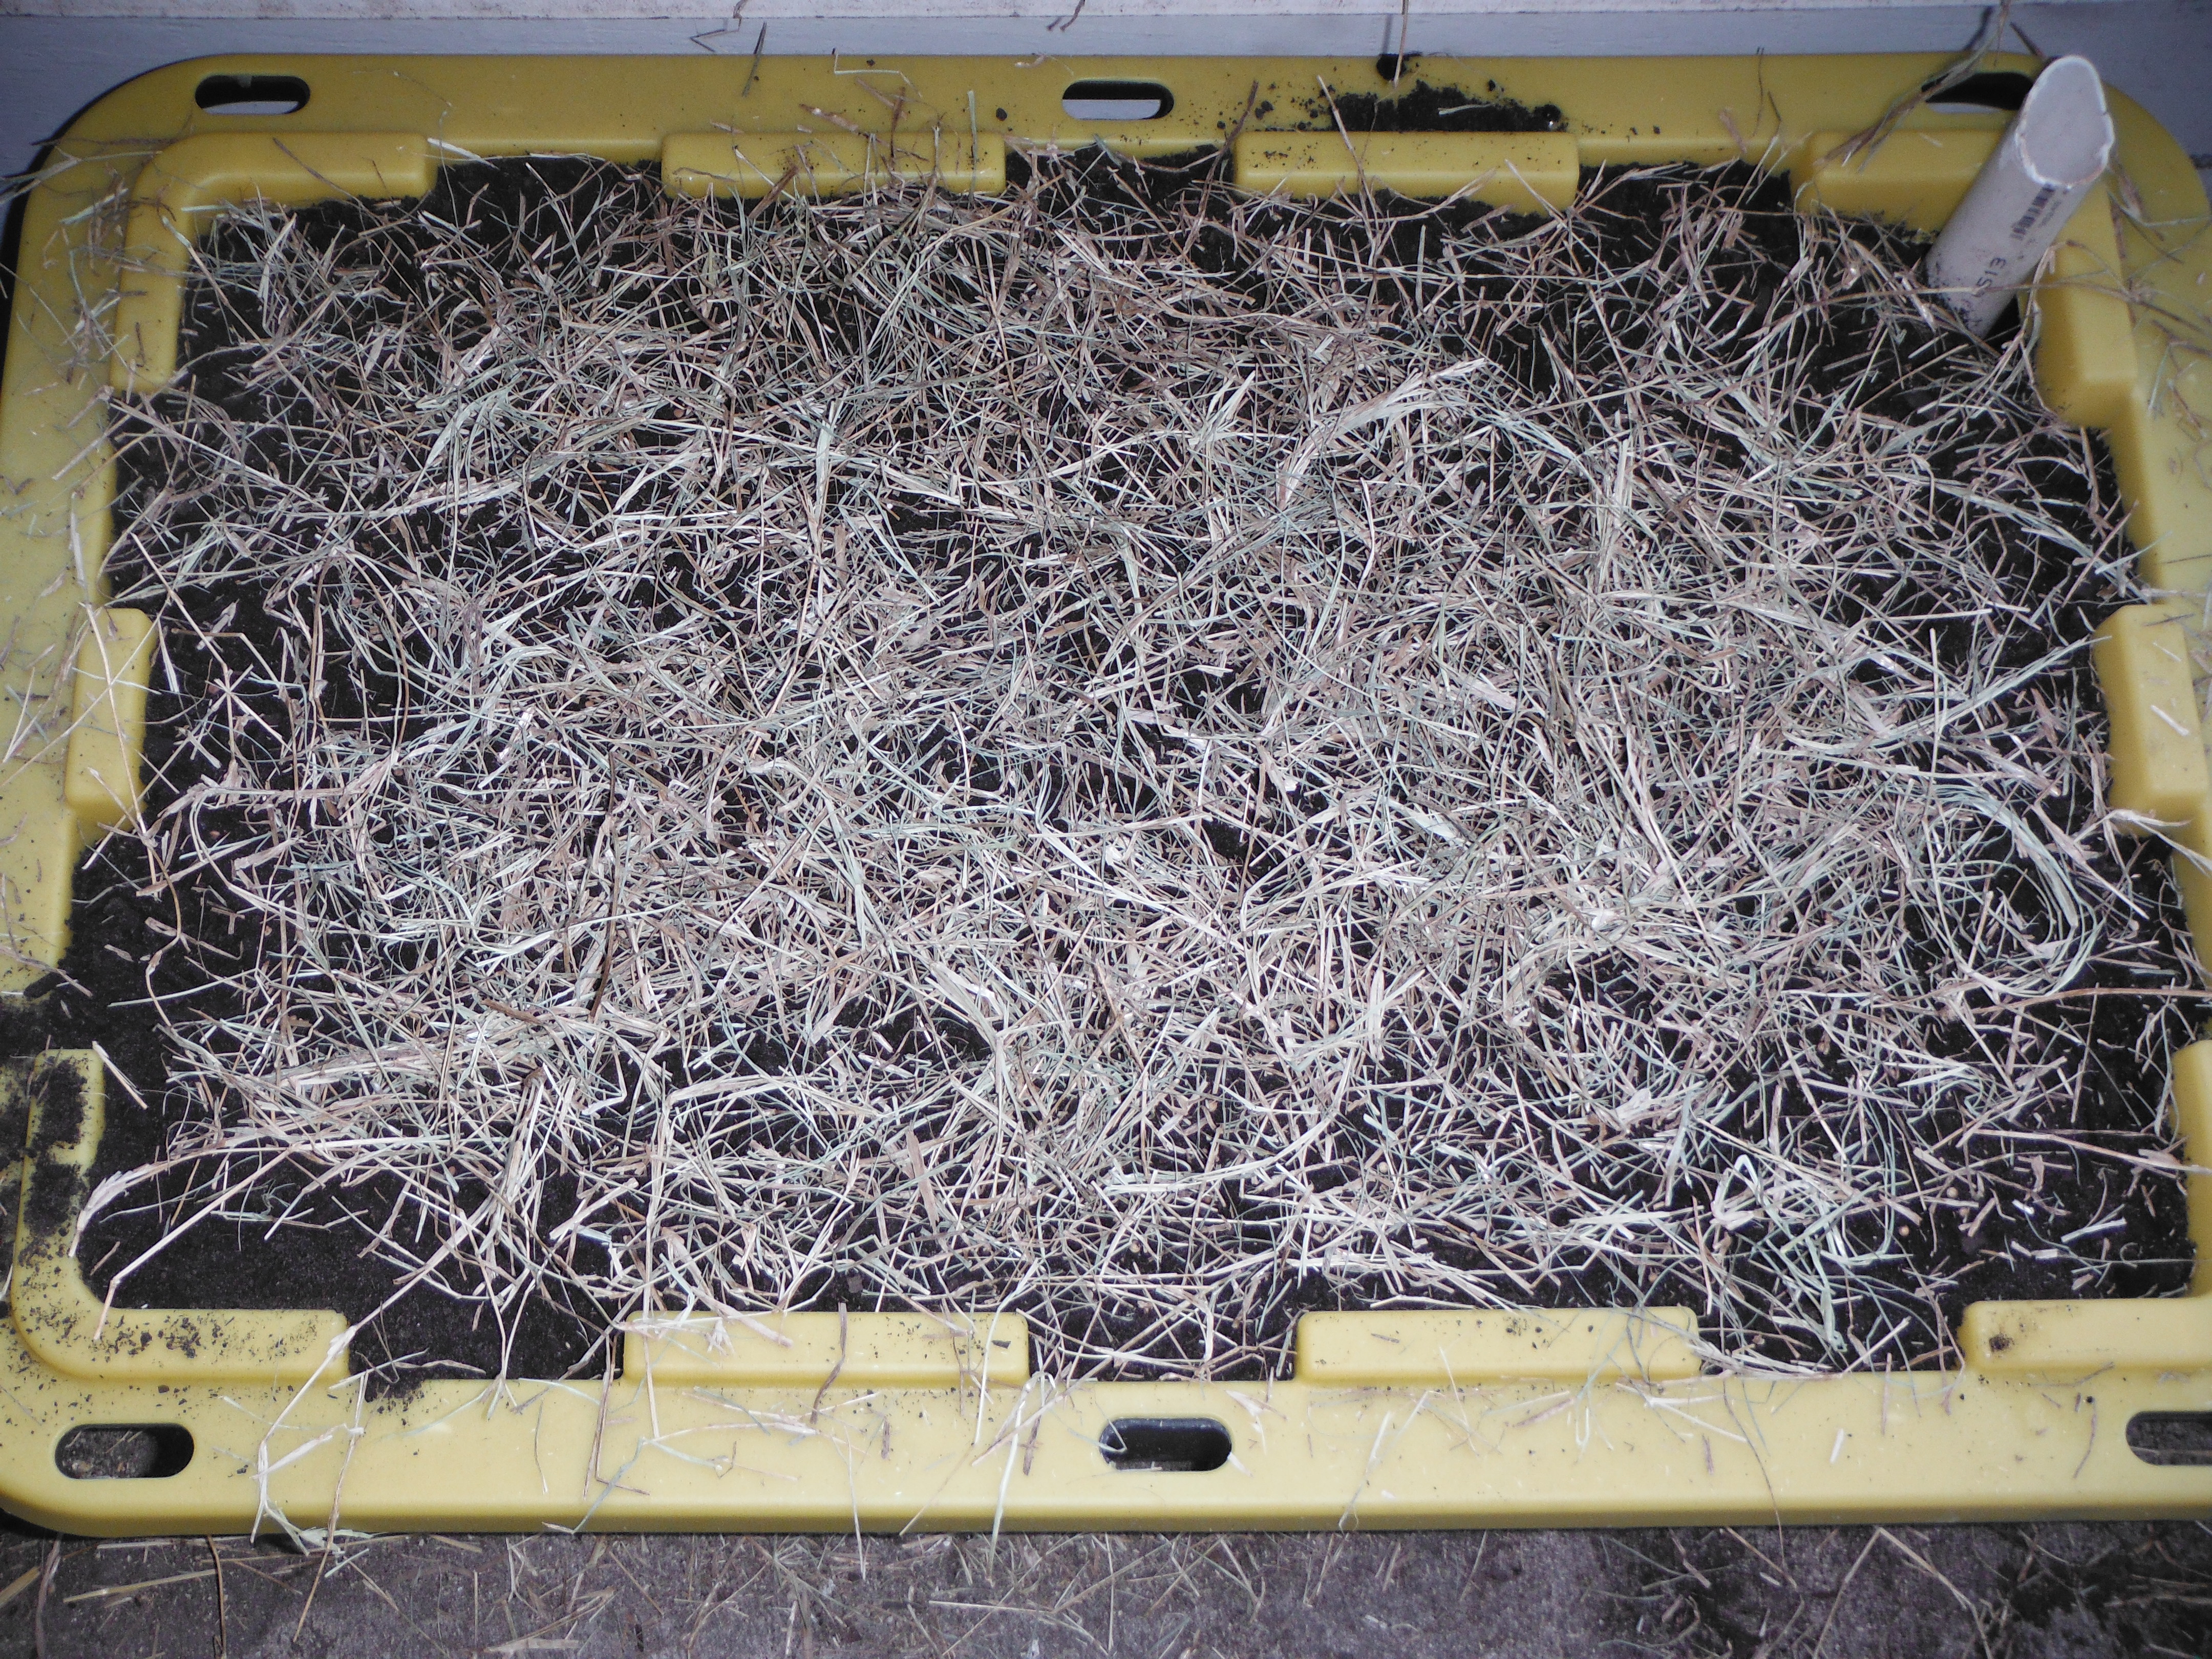
Then add water to the fill pipe until it starts to run out of the drain hole. Add seeds according to planting instructions. I then added loose hay as a mulch layer to help preserve some of the moisture.
And here it is, all finished, and growing some watermelon radishes!
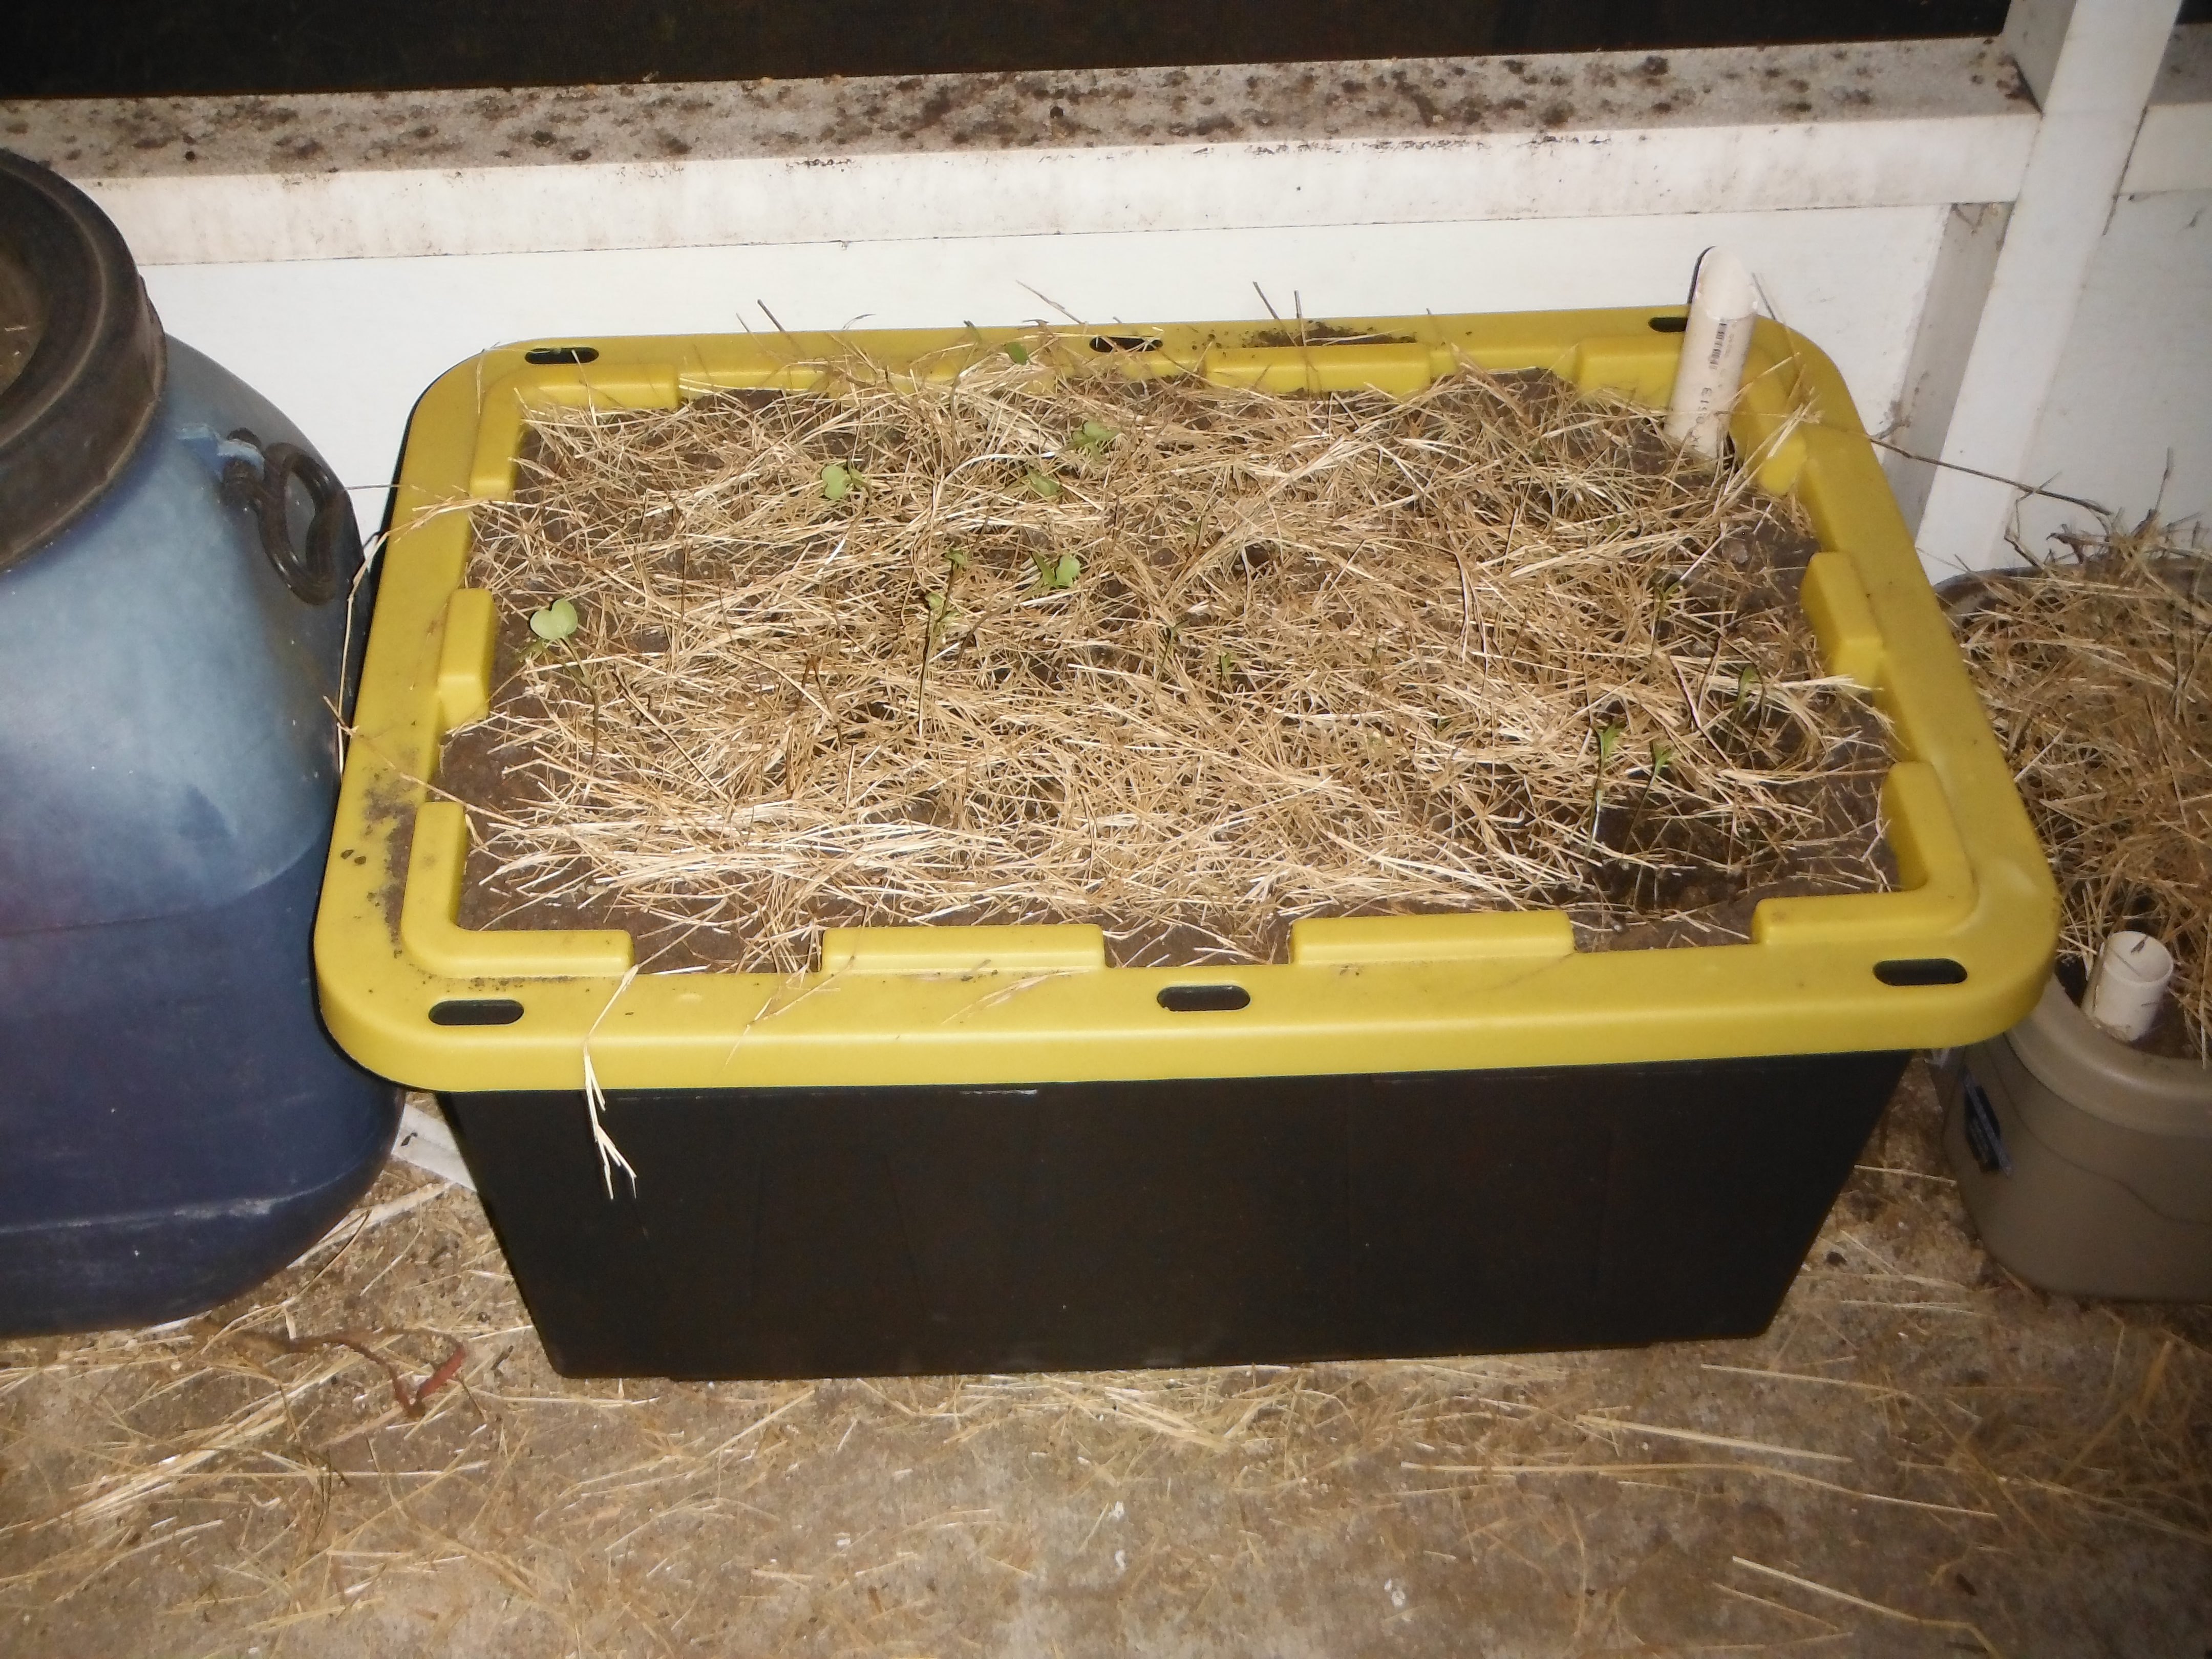
It needs to be watered every week or so, added through the fill pipe, until water pours out of the overflow hole. You CAN add water to the soil, but eventually that washes it all down into the water area. I made three of them about two years ago, and they still are in use, though a bit worn. One of them holds my sugarcane 🙂
Total cost, if you go with what I have shown in my pics is $15. I scrounged all but the tote itself. With cheaper totes, and buying soil and drain pipe, you still keep the cost under $15.
Now, anyone out there complaining that they don’t have enough room, or your soil is too poor, no longer have those excuses. Go make one, and plant something simple like basil or radishes.
Get started, take control of your life back, start a garden!
Also, be sure to read the follow up to this, Improving Soil.
Peace,
db
As always, please “like” FloridaHillbilly on Facebook, subscribe to my feed, follow me on Twitter, add it to Google+, Pinterest, Linkdn, Digg, and/or tell your friends! The more folks that learn to take care of themselves, the more than can answer “Who is John Galt?”
Need something from Amazon (and who doesn’t)? I earn a small commission from purchases made when you begin your Amazon shopping experience here. You still get great Amazon service and your price is the same, no matter what.
A better long term solution is to rebuild your soil in your yard I have had a great deal of sucess composting my kitchen scraps and using the garden of eden method using nothing but newspaper cardboard and free tree chippings from a local tree company all it requires is some good old fashioned excercise. Search it on utube there is a ton of info out there. Add some backyard chickens that will kick your compost into high gear (the litter w/manure is way high in nitrogen) After a few months I pulled back some of the mulch (tree clippings most of the newspaperand cardboard was decomposed) and said now that looks like what soil is supposed to look like, amazing, all the microbs that are supposed to be there have returned it is healthy soil that seems to protect the plants from diseases and insects most people spray some chemicals for, healthy plants grown in healthy soil resist these things, all from adding what used to just be garbage eggshells, paper, veggie peels, banana peels, etc…
It has always made NO SENSE to me to pay for dirt! Insanity
I agree…up to a point, but you must understand what I have to start with, sand. Just sand. No clay, no organics material. Go to a sandbox, remove the toys, that’s my yard.The only think holding it together is the mat of sod (trucked in) sitting on top. Trying to set a post using post hole diggers is frustrating at best, the sand below the sod is too loose to get lifted out by the post hole diggers.
But at least I have GREAT drainage 😛
And if you look at the very first line, I said I now use raised bed gardens. I also wrote an article about the soil I’ve developed in those beds. You can read it here:
http://floridahillbilly.com/more-than-just-dirt/
(You’ll also see one of my early self watering containers, and why its best to keep the lid ring on them.)
Looks like I have the subject for tomorrow’s article now- a soil update. Stick around, I think you’ll approve of my current methods 🙂
For any cat owners out there that use clay litter, you can use the large plastic containers from fresh step (other brands I think sell them too but fresh step is a white container and the plastic labels peels off). You basically use the same principle, stacking one within another, because of how they are shaped it leaves a couple inches in between. Free containers and keeps the buckets out of the landfills. I had great success with squash zucchini.
I’ve also done this very thing with 5 gallon buckets. It works very well 🙂
Thanks for the reminder!
I built an herb bed using similar principles, based on my experience raising African violets a couple of decades ago. I used a galvanized horse trough. I lined the bottom with large rocks and then put bagged soil (whatever was cheapest at the time) on top. I put three lengths of PVC pipe (1 1/2 ” diameter) with the bottom close to but not touching the bottom of the trough and the top sticking out of the soil to a level higher than the sides of the trough. I drilled several holes in the side of the trough about 3 inches from the ground for drainage when we have excessive rainfall. The one thing I did that I don’t see with your design was to “wick” the bottom water by using lengths of nylon cord – frayed at both ends – spread out through the rocks on one end and through the soil on the other end. The cord draws the water up from the reservoir into the soil as needed by the plants. I water through the pvc pipes so I don’t have to deal with nutrients washing through the soil and out into the rocks. I have had this going for four years now and have been very satisfied with the results. I mix in new soil as needed each spring. I have to replant some of the herbs every spring but have rosemary year round and sage that comes back every year from the roots. (I live in the Red River Valley of Oklahoma.)
The Super Sized version! Nice!
Build two of these from your plans. First itme they collapsed as the old pots at the bottom were too flimsy. Finally filled with 1/2 top soil and 1/2 black Kow then planted. I bought a hygrometer to keep a check on the soil. People can get a very inexpensive one from Lowes for under $8. The darn thing works well so far. Soil in the moist range. Plans weren’t clear about center hole and pot. I am assuming that acts as a wick for water? Other handy thing about your plans besides taking care of the watering is the ability to move it around as circumstances dictate. Thanks.
Sorry, yes the center is for wicking water up to the soil and to the plants.
Thanks for the follow-up!
db